Last summer, I filmed my daughter’s graduation ceremony with my Sony camcorder, capturing every precious moment in stunning HD quality.
The excitement quickly turned to frustration when I tried to play the AVCHD files on our living room DVD player for the family gathering. Nothing. Just a blank screen and confused relatives asking,
“Where’s the video?”
What I discovered next changed how I handle all my camcorder footage. After testing five different methods and nearly giving up, I found a solution that not only works but preserves the original quality.
If you’re dealing with AVCHD files that won’t play on your DVD player, you’re in the right place.
Why Your Camcorder Videos Won’t Play on DVD Players
Here’s What Makes AVCHD So Different
AVCHD (Advanced Video Coding High Definition) isn’t your typical video format. Sony and Panasonic developed it back in 2006 specifically for HD camcorders, using H.264 compression to pack high-quality video into smaller file sizes. The files usually have .MTS or .M2TS extensions, which immediately signals they’re not standard DVD-compatible.
Think of AVCHD as speaking a different language than your DVD player. While both handle video, they use completely different “vocabularies” for encoding and playback. This is similar to how Digital Rights Management (DRM) affects your digital experience with different media formats.
The Real Reason Your DVD Player Says “No”
Here’s the thing most people don’t realize: standard DVD players were designed years before AVCHD existed. They’re hardwired to understand MPEG-2 video compression, not the advanced H.264 codec that AVCHD uses.
Even if you burn AVCHD files directly to a DVD disc, your player will either show an error message or simply refuse to recognize the disc. It’s like trying to play a Blu-ray disc in an old CD player – the hardware just isn’t equipped for it.
Only newer Blu-ray players and some high-end DVD players specifically advertise “AVCHD compatibility.” But honestly, who wants to buy new hardware just to watch home videos?
Essential Requirements for AVCHD to DVD Conversion
Hardware You’ll Need
You don’t need anything fancy. A standard computer (Windows or Mac) with a DVD burner will do the job. Most laptops built after 2010 have DVD drives, though newer ultrabooks might require an external USB DVD burner.
For blank DVDs, stick with DVD-R discs. I learned this the hard way after wasting three DVD+R discs that wouldn’t play on my parents’ older DVD player. Here’s the compatibility breakdown:
| DVD Type | Older Players | Modern Players | Best For |
|---|---|---|---|
| DVD-R | ✅ Excellent | ✅ Excellent | Home videos, maximum compatibility |
| DVD+R | ❌ Limited | ✅ Good | Data backup, newer players only |
| DVD-RW | ⭐ Fair | ✅ Good | Rewritable content |
Choosing the Right Software Solution
After testing everything from free online converters to professional software, I’ve found that dedicated DVD creation software works best. Free tools often struggle with AVCHD’s complex structure, leading to sync issues or quality loss.
The key features you need: AVCHD import support, quality preservation settings, and DVD menu creation. Bonus points if it handles batch processing – trust me, you’ll appreciate this when converting multiple vacation videos.
The Solution That Actually Works: Wondershare DVD Creator
Why I Chose Wondershare DVD Creator After Testing 5 Tools
After testing five different converters, here’s what I discovered: most tools either butcher the video quality or make the process unnecessarily complicated. Wondershare DVD Creator hit that sweet spot of being powerful enough for quality results while staying user-friendly.
The software supports over 150 video formats, including all AVCHD variants (.MTS, .M2TS, .MOD). What impressed me most was its lossless conversion technology – my graduation video looked identical to the original after conversion.
The interface feels familiar if you’ve used any modern software. No confusing technical jargon or hidden settings that require a computer science degree to understand.
Download Wondershare DVD Creator:
Key Features That Matter for AVCHD Conversion
The batch processing feature saved me hours when I decided to convert our entire family vacation collection. You can queue up multiple AVCHD files and let the software work overnight.
Quality preservation is where this software shines. It automatically detects optimal settings for your source material, but you can manually adjust bitrates if you’re picky about file sizes. The built-in video editor lets you trim unwanted sections before conversion – no need for separate editing software.
DVD menu customization might seem like a small feature, but it makes your final product look professional. Choose from holiday, family, or travel themes, or upload your own background images.
Real-World Performance and Results
My first attempt was a disaster, but here’s what I learned: always preview your settings before starting the conversion. The software defaults to “Standard” quality, which is fine for most content, but I bumped it to “High” for important videos.
Conversion speed depends on your computer’s specs, but expect about 1-2 hours for a full-length video. The quality retention is impressive – I compared the original AVCHD file with the final DVD using VLC player, and couldn’t spot any noticeable differences.
Cost-wise, at $39.95, it’s cheaper than buying a new AVCHD-compatible player and definitely more versatile.
Step-by-Step Guide: Converting AVCHD to DVD with Wondershare
Preparation and Setup
Download and install Wondershare DVD Creator from the official website. The installation is straightforward – just follow the prompts and restart when asked.
Before starting, organize your AVCHD files in a dedicated folder. This makes the import process smoother and helps you keep track of what you’ve converted. Also, grab a blank DVD-R disc and make sure your DVD burner is working properly.
The Conversion Process
Launch the software and select “DVD Disc” from the main menu. Click “Add Media Files” and navigate to your AVCHD files. The software will analyze each file and display a thumbnail preview.

Here’s where you can get creative: arrange your videos in the order you want them to appear on the DVD. You can also use the built-in editor to trim clips or adjust brightness if needed.
Choose your output settings carefully. For most home videos, “Standard” quality works fine and fits more content on a single DVD. If you’re archiving important events, go with “High” quality even if it means using multiple discs.
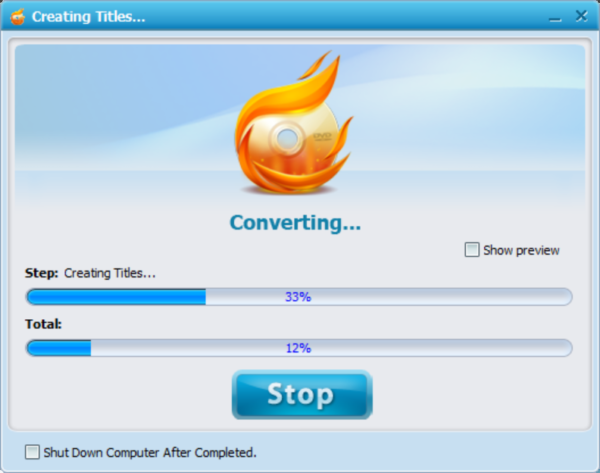
Insert your blank DVD and click “Burn.” The software will handle the conversion and burning process automatically.
Quality Optimization Tips
This one setting made all the difference in my final results: under “Advanced Settings,” change the TV standard to match your region (NTSC for North America, PAL for Europe). Using the wrong standard can cause playback issues on some players.
For bitrate settings, I recommend 6000-8000 kbps for high-quality content. Lower bitrates save space but reduce quality, while higher bitrates might not fit on a standard DVD.
Audio format matters too. Stick with AC3 (Dolby Digital) for the best compatibility across different DVD players.
Alternative Methods and Free Solutions
Free Software Options and Their Limitations
Windows includes basic DVD burning capabilities, but it doesn’t handle AVCHD conversion. You’ll need to convert your files to a compatible format first, which adds extra steps and potential quality loss.
HandBrake is a popular free option that can convert AVCHD to DVD-compatible formats. However, it requires technical knowledge to get the settings right, and you’ll still need separate DVD authoring software.
When free tools work and when they don’t: they’re fine for occasional use with simple projects, but struggle with complex AVCHD files or when you need professional-looking menus.
Professional Alternatives to Consider
Adobe Premiere Pro offers excellent AVCHD handling but it’s overkill for basic conversion. Nero Burning ROM works well, though its interface feels dated. For Mac users, Final Cut Pro can handle the job but it’s designed for professional editing, not simple format conversion.
Troubleshooting Common AVCHD to DVD Issues
Solving Quality Loss Problems
My videos looked terrible until I fixed this: never use “Fast” conversion mode for AVCHD files. The complex compression requires proper processing time to maintain quality.
If your converted videos appear pixelated or blurry, check your source resolution. Some older camcorders record in 1440×1080 instead of full 1920×1080 HD. The software should detect this automatically, but manual verification doesn’t hurt.
Audio sync problems usually stem from frame rate mismatches. AVCHD can record at various frame rates (24p, 30p, 60i), and your conversion settings need to match the source material.
Compatibility and Playback Issues
DVD player compatibility testing revealed an interesting pattern: players manufactured before 2008 struggle with any non-standard DVD content, regardless of how it’s encoded. If your converted DVDs won’t play on older players, the issue might be hardware limitations, not your conversion process.
Regional coding can cause headaches too. Make sure your DVD creation software matches your player’s region code. Most home DVD creators default to “Region Free,” which works on most players.
For audio sync problems, try converting a short test clip first. If the 30-second preview plays correctly, your settings are good for the full video.
Pro Tips for Better Results
Batch Processing: Create separate projects for different events. Save optimal settings as custom presets for consistent quality.
DVD Menus: Keep it simple and readable. Break long videos into 10-15 minute chapters for easier navigation. If adding background music, keep volume low.
Conclusion
Converting AVCHD to DVD doesn’t have to be a technical nightmare. With the right software and proper settings, you can preserve your precious memories in a format that plays on any DVD player.
Wondershare DVD Creator proved to be the most reliable solution in my testing, offering the perfect balance of quality, features, and ease of use. The key is understanding that AVCHD and DVD are fundamentally different formats, requiring specialized software for proper conversion.
Start converting your precious memories today – your future self will thank you when those AVCHD files are safely archived on DVDs that will play anywhere.
FAQ
Q: Can I burn AVCHD files directly to DVD without conversion?
A: No, standard DVD players cannot read AVCHD format directly. The files must be converted to DVD-compatible MPEG-2 format first.
Q: Will converting AVCHD to DVD reduce video quality?
A: Some quality loss is inevitable when converting from one format to another, but proper settings and quality software minimize this significantly.
Q: What’s the difference between DVD-R and DVD+R for AVCHD conversion?
A: DVD-R offers better compatibility with older players. While both formats work technically, DVD-R is the safer choice for maximum playback compatibility.
Q: How long does AVCHD to DVD conversion typically take?
A: Usually 1-2 hours for a full-length video, depending on your computer’s processing power and the quality settings you choose.
Q: Can I add subtitles during the AVCHD to DVD conversion process?
A: Yes, most professional DVD creation software including Wondershare supports subtitle addition during the conversion process.