Modern technology makes it easy to record videos; however, a few years ago, people used camcorders to record their special moments on VHS tapes. If you have recently moved and found a box of these VHS tapes from years past, the best way to make sure they are not lost and can be viewed with loved ones is to convert VHS to DVD.
Converting your favorite VHS memories is a great way to keep them around for everybody to enjoy. Not only will they remain intact despite magnetic tape’s tendency to decay, but you can also put a modern twist on them. With the best VHS to DVD converter, you’ll be able to turn your recordings into digital files and make DVDs or store them in the cloud. What’s more, using a converter is easy and straightforward. Just use it in tandem with your video recorder or camcorder, and you’re all set. Get one today and make sure those precious memories last a lifetime!
Contents
TogglePart 1. Convert VHS to DVD With A Video Capture Device
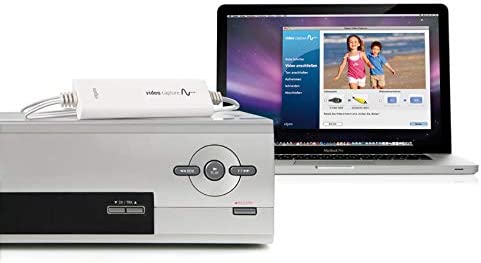
Transferring VHS content to DVD discs is quite a tricky task, for which the most practical and straightforward solution is to use an analog-to-digital video capture device. Using this method, your VHS tape’s content is recorded on your computer’s hard drive by linking it with & a VCR and then transferred onto a disc using DVD writing software.
However, other factors need to be considered, such as the RAM of your PC, Hard drive speed, and processor speed. This helps efficient transfer from VHS to a DVD with minimal data loss and good quality.
How to convert VHS to DVD step by step
First, we need a DVD make software which you can download below.
Install the software program and launch it.
Now, ready all VHS video files on your computer and watch the tutorial below to use this DVD maker application to burn videos into DVD step by step:
Note: The video guide will give you a quick overview of making a DVD from a video file. For those who want more details, please read through the text guide following the video.
The DVD creator is easy to use and safe to use. Supports all modern Windows versions: 10, 8, and 7.
After downloading the DVD maker, double-click the installation file “ws_dvdcreator_win_av.exe.”
- Select your preferred language and click “ok.”
- Click “Next” on the wizard window
- tick “I accept the agreement”
- Choose a destination folder for installation and click “Next.”
- Click “Next” and then click “Install.”
Step 1: Import video files
Click on “Free Trial” to explore its features without buying anything! The “Source” tab will appear first, where you can easily import all video files.
To get started, click “+import” and select the videos or images stored in your computer; alternatively, drag and drop them into the main interface for quicker importing.
Step 2: Create a DVD menu
Create interactive DVD menus
On the left side of your video player, create a menu with titles that make sense. Each title will be the name of each chapter or section you watch when playing them on DVD. Make sure to rename these titles so they are clear and easy to follow.
Free menu templates
With so many free DVD menu templates available, you can create a unique and personalized design for your DVD. Choose the one that stands out to you and make it yours!
Thumbnail
It allows you to choose a video frame as the thumbnail for the menu photo.
Add background music
There is a default background music for a DVD menu. You can replace it with your favorite one by clicking add audio icon to browse your local music file.
Tips: you can source music from streaming sites like Spotify as your background music. Check how to rip Spotify music as mp3 here
Step 3: Video editing tool (Optional)
You can make creative and customized changes to your video before burning it to DVD by clicking on the edit button. You can tweak the video effects, like saturation and brightness, add watermarks and subtitles, and rotate photos. Text editing options allow you to choose font size, color, and style.
Moreover, to enhance your slideshow experience, add transition effects between photos and background music. The integrated trimming tool allows you to select your favorite song and match its length with the rest of the show. Create amazing new audio experiences with fade-in/fade-out and adjust the audio volume according to your needs.
With a few clicks, you can easily customize this special moment into an unforgettable one.
Step 4. Start making VHS videos for DVD
You’re nearly done! To guarantee your DVD is perfect, click the “Preview” button to check it. If you’d like, customize the output settings so that this disk fits exactly what you need.
Output DVD settings
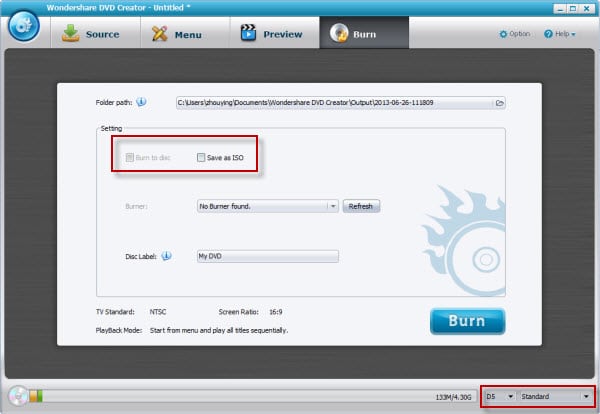
If necessary, change DVD burning parameters. A new software window pops up. Here’s what you can choose:
- Title for the disc and chapters;
- DVD menu type (text, image, or custom background);
- Volume: Standard 4.7GB, Mini 1.4GB, Double Layer 8.5GB;
- Aspect ratio: 16:9 or 4:3;
- Encoding system: PAL or NTSC;
- Audio codec: AC3 or MP2.
Where you are situated can determine whether your video output is PAL or NTSC. In Europe and Australia, the standard framerate of 25fps will apply with the MPEG-2 codec (DVD format). Meanwhile, 29.97 fps applies to those living in America that use DVD formats – be sure not to deviate from these defaults as they cannot handle high resolutions like 720p, 1080p, or 4K due to their nature!
After confirming everything is working correctly, insert a blank DVD into your computer’s ROM (or USB DVD drive). Then hit the “Burn” button to convert the video to DVD. Once it completes processing, you can enjoy your newly-burned video on any home DVD player!
It may take some time for this to be completed. The time it takes to convert the DVD depends on its graphic drive model and video length. Once finished, the application will ask if you’d like another copy made – accept that offer if necessary! Then enjoy your newly converted videos in the comfort of your home once they’re ready.
Part 2. Convert VHS to DVD With A DVD Recorder
Converting those old VHS tapes into more modern DVD form may seem intimidating, but it’s quite easy. All you need is a separate VCR and DVD player that can record videos and an RCA cable, which most likely comes with the equipment you already own, like your TV, cable box, and so on. The process isn’t as quick as using a combo device is, but it does the job of transferring VHS over to DVD with ease.
Finally, when set up properly, this method can be a great way to ensure scanned copies of your favorite home videos are always at hand, no matter where you go.
Steps to record VHS to DVD using DVD Recorder:
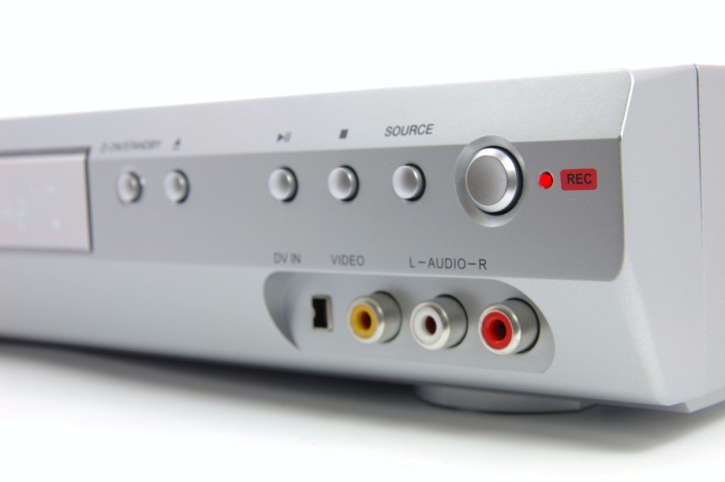
Step 1: To begin, link your VCR to the DVD recorder. Connect the composite video output and RCA analog stereo output of the VCR cord into their specific inputs on the DVD recorder. The cables are color coded – yellow, red, white, so make sure you plug each colored wire from your VCR into its corresponding input port on your DVD recorder for a seamless connection.
Step 2: Place the VHS tape you desire to replicate into your VCR and a blank disc right into your DVD recorder.
Step 3: To transfer VHS tapes to DVD, press the play button on your VCR and the record button on your digital disc player.
Part3. Transfer VHS to DVD Using A DVD Recorder/VHS VCR Combination Unit
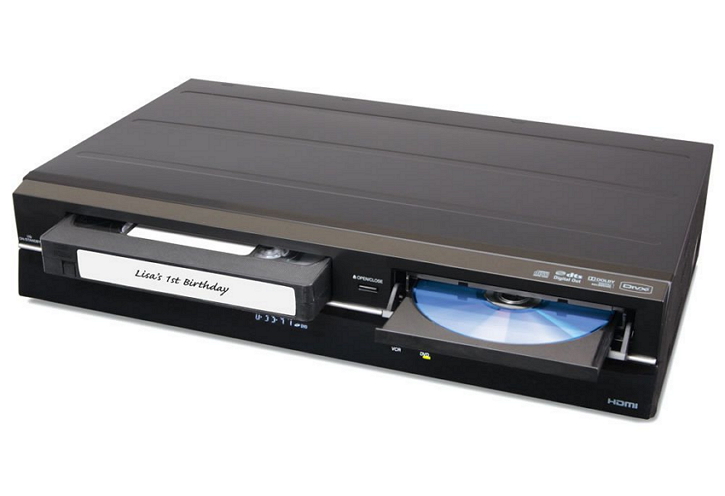
For those looking for an alternative to transferring VHS tapes to DVD, a DVD Recorder/VHS VCR Combination Unit is the perfect solution. Not only can this single unit play and record DVDs and VHS tapes, but it also includes a feature known as cross-dubbing, which allows you to copy from one format to another quickly. With several types of brands available today, finding the right recorder has never been easier!
To transfer VHS tapes to DVDs, you will need a DVD recorder/VHS VCR combination unit. Follow these steps:
Step 1: Insert your VHS tape and DVD disc into the machine to get started.
Step 2: To transfer your VHS tapes to DVD, press Play on the side of your VCR and Record on the side of your DVD. With this simple step, you can have a completely transferred disc in no time!
Method 4. Elgato VHS to DVD converter
Elgato’s device is the best for converting VHS to DVD. For starters, its quality keeps your transferred material as accurate and clear as possible – preserving audio and video definition that would otherwise be lost.
Moreover, it has tried-and-tested connections, including RCA, S-Video, and SCART inputs. You can easily transfer footage from any VCR or camcorder to your computer. Of course, with compatibility across Windows and macOS platforms, this converter performs exceptionally well across devices. Although slightly pricey compared to its competitors, the unit shies away from disappointment, making it our top choice.
Method 5. VHS to DVD Converter Services
Converting VHS tapes to digital DVD format can be difficult and tricky if you are not tech-savvy. Fortunately, you can choose to have the process done by someone else. Nowadays, there are several VHS to DVD service providers where you can send your tapes and pick up the converted discs. Popular retail corporations such as Walmart, Costco, and Amazon offer these services with different features and packages.
Depending on your needs and budget, you have plenty of options to consider to obtain the best possible quality of your precious memories stored on VHS tapes.
1. Walmart VHS to DVD Service: Walmart’s service provides a wide array of formats, including VHS, S-VHS, VHS-C, Digital 8 Betamax Foreign MiniDV DV DVCAM, and DVC. For $25 per tape, you can convert your VHS to DVD with a maximum runtime of two hours on each disc.
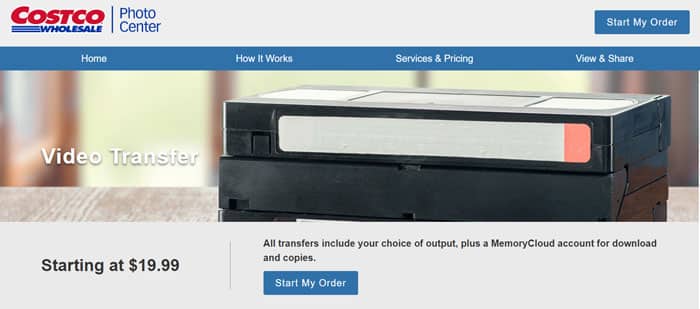
2. Costco DVD: Take advantage of our comprehensive video conversion services to transfer your treasured VHS, S-VHS, VHS-C, Super 8, 8mm videotape, 8mm film, and MiniDV tapes into a more modern format – DVD. We even convert PAL foreign tapes to NTSC! And with prices starting at just $20 for 2 hours on two separate videos, you won’t want to miss this deal.
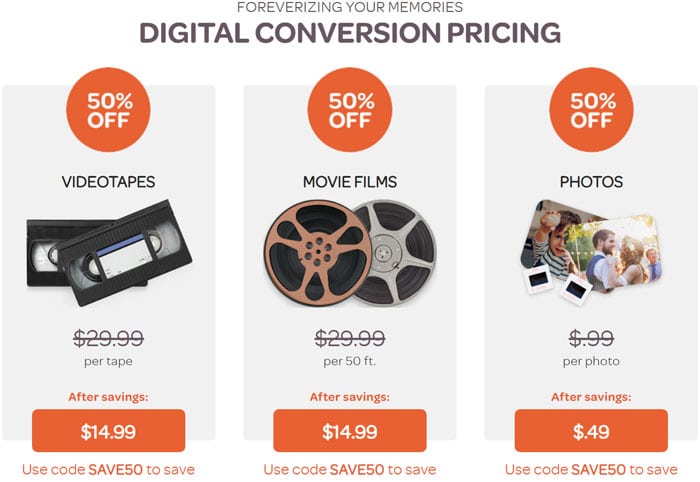
3. iMemories.com: Transform your old VHS, VHS-C, 8mm tape, Betamax, 8mm film, Super 8, MiniDV, or 16mm film into a modern digital format with our convenient and competitively priced website! Our service costs just $13 per individual video cassette or reel up to 50 feet in length.
Some other popular names include Southtree, Target, CVS, and Sam’s Club. Search for VHS to DVD service near me and you will get the list of available options.
Conclusion
With all the options mentioned above, it is clear that converting VHS tapes to digital DVD format can be done in many ways. Wondershare DVD Creator stands out as the best VHS to DVD converter available. Not only is it able to convert your VHS tapes into a digital format of superior quality, but it also takes editing tracks to the next level with its easy-to-use video editing and template selection and customization features. Whether for home or business use, Wondershare DVD Creator is the definitive choice when looking for a tool to transfer those treasured memories from VHS tape to reliable discs that will last many years. Download and experience the power it brings now with a free trial!

