It's the time to make a Blu-ray
1-click to burn video to Blu-ray disk for playing on your home Bluray player.
This Blu-ray creator will help your convert any video (MP4, AVI, MKV and MOV) to both DVD or Bluray disk which is playable on any Bluray player.
Burn Videos and Photos in 180+ formats to Blu-ray/DVD movies with 40+ selectable disc menu templates easily.
The contents
Bluray making tool
Download and install DVD Maker software on computer
how to use
The detailed guide show you how to burn a DVD to play in a DVD player
Video guide
Tired with text guide? check the video guide here
Reviews
What other people are saying

Free Download Blu-ray creator
- Making your own bluray from your favorite videos with few simple steps
- The best Blu-ray creator that supports ALL popular video formats like MP4
- Create photo sideshows with transition effects and background sound
- Edit videos such as trim, crop, special effect, add watermark before burning video to Blu-ray
- Create Blu-ray menu with FREE Blu-ray menu templates
How to use
How to burn video to Blu-ray/DVD file?
Step 1: Import video files
To begin, launch Blu-ray Creator. The Blu-ray/DVD Creator module can be accessed by clicking the Blu-ray/DVD Creator tab.
Start the software from your desktop. Click the “Import” button to browse video or image files from your computer, or you could just dragging-and-dropping files into the main interface.
Step 2: Add Source Video Files
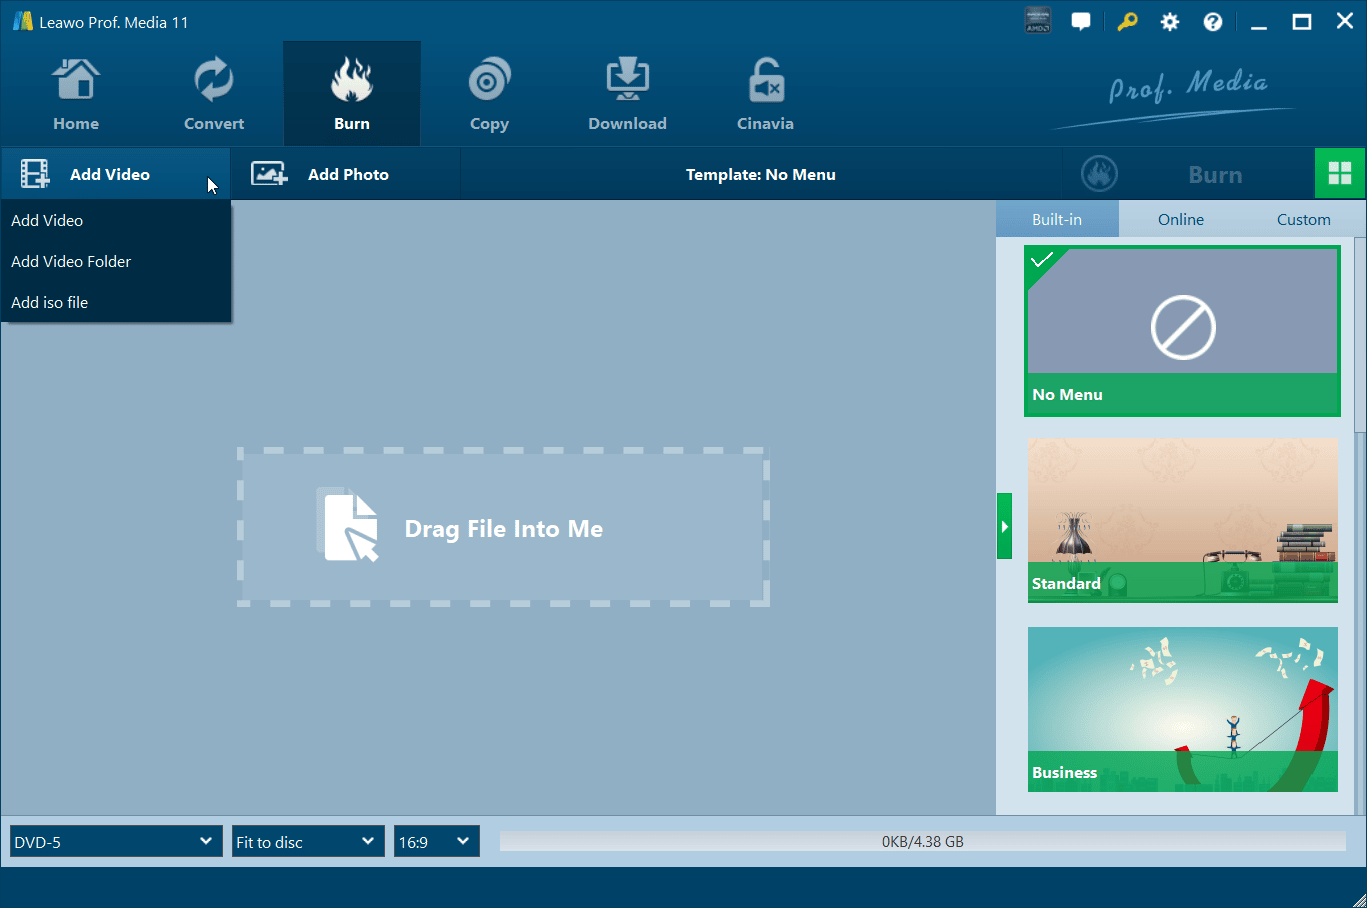
Drag and drop source video files directly to the Creator interface or choose Add Video>Add Video/Add Video Folder to select a video or video folder from your computer.
Step 3: Output Settings
You can burn to BD-50, BD-25, DVD-9, and DVD-5 and select between 4:3 and 16:9 aspect ratios (you can only burn to Blu-ray in 16:9).
Set quality to “Fit to disc,” which best fits the video. The bar next to the Aspect Ratio option shows how big the file will be. Before you get to the next step, you can edit the video and the disc menu.
Please check Part 6, video editing, and Part 5, Disc Menu Customization, to see more details. And you can choose the subtitles and soundtracks you like in the file. Click to select the subtitles you want.
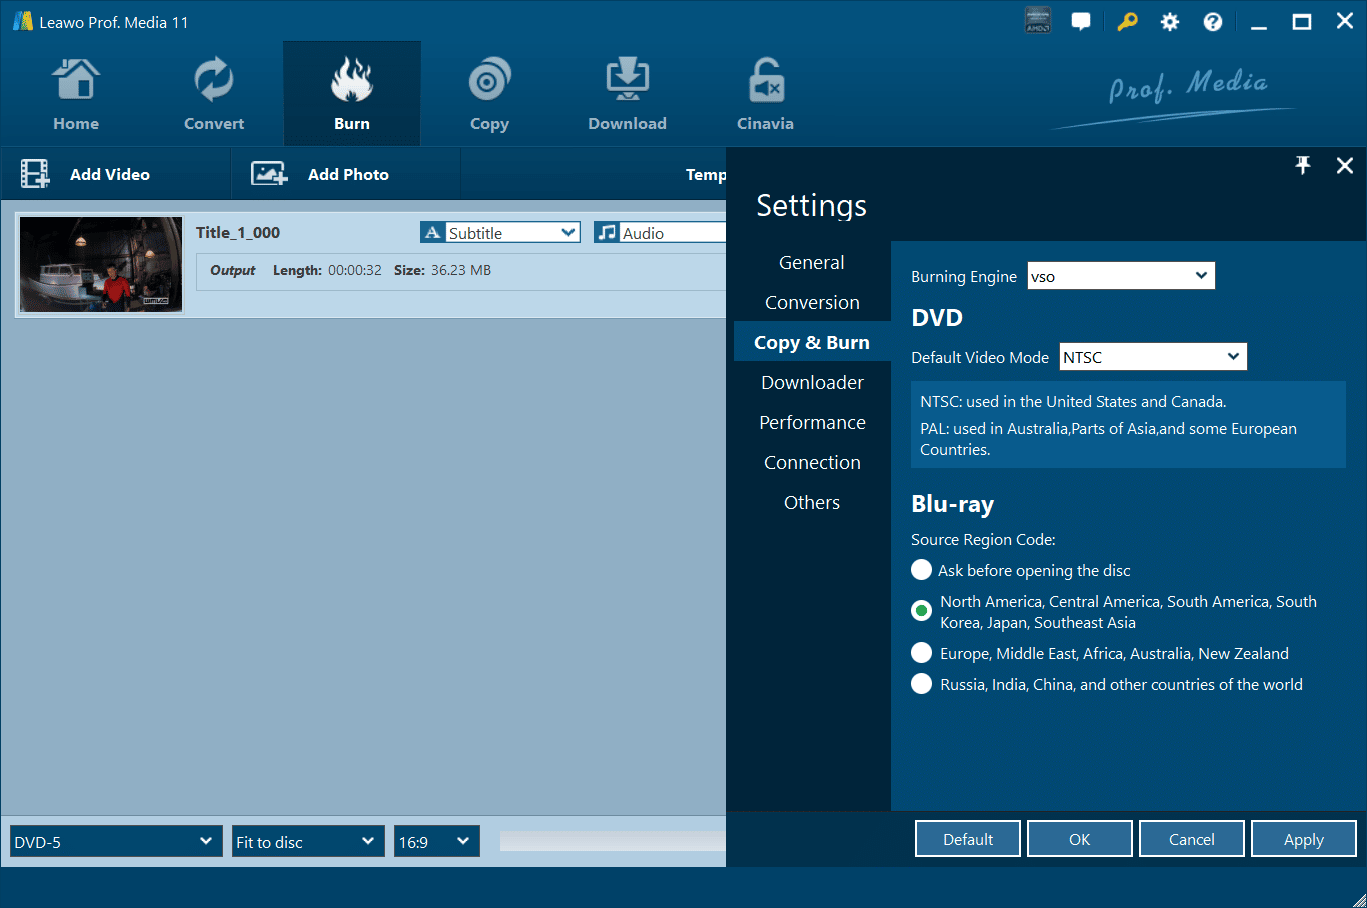
You can even import one from your computer. Click to choose a soundtrack in the file. (Note: You can only select one set of subtitles and one soundtrack for the output file.) And you can go to Settings to set the Default video mode and Blu-ray region code. Click the Settings button, and then click Copy & Burn. You can select VSO or ImgBurn.
Step 4: Burning Settings
A sidebar will appear when you click the green Burn button on the interface.
The Disc Label box allows you to rename the output file’s label. To convert the video into a Blu-ray/DVD folder, choose the Folder option. You can also select ISO File if you want an ISO file. Click the Browse button under Save to Option to select the location for the output file.
You can then convert the video to a Blu-ray/DVD folder or ISO file by clicking the Burn button at the bottom. (Note: It is possible to create both a Blu-ray/DVD folder and an ISO file at the same time.)
Burning a video or ISO file to a new CD-ROM disc is possible if you have a blank disc inserted. Click the Burn button at the bottom of the sidebar to start burning the video to the blank disc. Make sure that the option for burning to a blank disc is enabled.


